Friday, March 25, 2011

Circuit Construction

The PIC microcontroller circuit is given by my supervisor once the simulation is succeed. It was designed by Mr Mazran as a starter kit for all of the students who are supervise by him. Other than that, to make the model more useful, I have made a switch circuit in order to control the PIC microcontroller. It is infra red transmit and receive circuit which is using the basic component such as IC 555 timer for transmitter and IC 4069 as well as relay in the receiver circuit. The circuit will be function when the switch is turn on at the transmitter and the signal of infra red will be receive at the receiver. Once the signal is transmitted, the PIC microcontroller will turn on. 


Figure 1: IR Transmitter Switch Circuit

Figure 2: PIC microcontroller Circuit


Figure 3: IR Receiver Switch Circuit


Infrared remote controls are using a 32-56 kHz modulated square wave for communication. These circuits are used to transmit a 1-4 kHz digital signal (OOK modulation) through infra light (this is the maximum attainable speed, 1000-4000 bits per sec). The transmitter oscillator runs with adjustable frequency in the 32-56kHz range, and is being turned ON/OFF with the modulating signal, a TTL voltage on the MOD input. On the receiver side a photodiode takes up the signal. The integrated circuit inside the chip is sensitive only around a specified frequency in the 32-56 kHz range. The output is the demodulated digital input (but usually inverted), just what we used to drive the transmitter. When the carrier is present, this output is usually low. When no carrier is detected, the output is usually high.

PLC Modem Connection

This type of Power Line Communication Modem is using IC TDA 5051. This IC is a modem IC, specifically dedicated to ASK transmission by means of the home power supply network, at 600 or 1200 baud data rate. It operates from a single 5 V supply.It is able to control home appliances and provides full digital carrier generation and shaping. The block diagram of the IC and the pin connection are as below:

Figure 1: Block Diagram
Figure 2: Pin Connection of the IC


This is the actual connection of the PLC modem trainer which is available in the lab room. 

Figure 3: The connection of PLC Modem

Figure 4: The actual trainer

At the same time, I need to configure the PLC modem by using Hyper Terminal. All of the connections are as below. The modem is connected to the laptop using serial port and was set to comm 3 in order to connect to the hardware. Once the signal is transmitted, the lamp will turn on simultaneously.

Figure 5: The connection of Hyper Terminal and hardware

Tuesday, February 8, 2011

Project Progress

My project requires switch that will turn on and off the appliances. In order to turn on and off the appliances, the appliances need to have their own frequency.

On Jan,4th 2011, I have got my Power Line Communication modem at Industrial laboratory which provide the modem trainer. The trainer consists of modem that able to accomplish my project soon. The transmitter of the modem have viewed as below :-

FE 03 3F 3F FD
FC 03 3C 07 C6

Meanwhile, the receiver of the modem have viewed as below :-

FE 03 5C 01 A0 ; one device transmitter end to
FE 03 40 01 BC ; one device is status fail

The transmitter and receiver viewed the details of the operation of the trainer after the button start have pushed to turn on. It gives the output of the appliances operation such as fan and light. The picture below is the basic diagram of modem connection with the switch and trainer.

Wednesday, January 12, 2011

Power Line Communication Modem

Just got the power line communication modem from Electronic Laboratory. The pictures are as below:-


Once the modem is available, I will be able to proceed with the study of modem operation and configuration by using Hi-Any Home 1000 user's manual.

PSM 1 Presentation

The PSM 1 presentation was held on 26th of November 2010. Every final year student need to present their project proposal in order to proceed their projects..

The new running light circuit

Bill of Material


Bill Of Materials For running light cct.DSN
Design Title
:
running light cct.DSN
Author
:
Revision
:
Design Created
:
Wednesday, September 01, 2010
Design Last Modified
:
Monday, January 10, 2011
Total Parts In Design
:
21
9 Resistors
Quantity:
References
Value
Order Code
8
R1-R8
470

1
R9
47k

2 Capacitors
Quantity:
References
Value
Order Code
2
C2, C3
15pF

1 Integrated Circuits
Quantity:
References
Value
Order Code
1
U1
PIC16F877A

8 Diodes
Quantity:
References
Value
Order Code
8
D1-D8
LED-BIBY

1 Miscellaneous
Quantity:
References
Value
Order Code
1
X1
CRYSTAL

 
Monday, January 10, 2011  4:43:47 PM


Wednesday, September 1, 2010

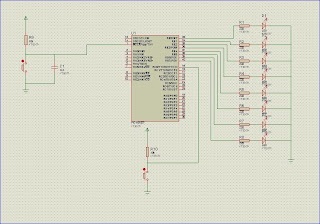
Running Light Circuit-Proteus..

Design a running light circuit using Proteus Software


After simulation, click Tools>Bill of Materials>HTML output. BOM used for list of component in the circuit.